Can a beginner repair a bicycle puncture?
Yes—on a conventional tubed wheel, you can replace the punctured inner tube or patch a suitable small hole. You need a compatible tube or patch kit, tire levers, a pump and any tools required for your axle. Find the cause before reassembly. Do not ride until the tire is seated correctly, the wheel is securely attached and the brakes work. Follow your bicycle and component manuals where their instructions differ from this guide. (parktool.com)
1. Confirm that this is a tubed tire
This guide covers a conventional bicycle tire with a separate inner tube inside it. The tube holds the air; the tire provides the outer casing and tread.
A tubeless setup holds air without that separate tube, using an airtight rim arrangement and a separate valve, typically with sealant. Tubeless-ready equipment does not prove that the wheel is currently running tubeless: some compatible tires and rims can be used with a tube. Check the bicycle’s setup information or ask the shop that assembled it. Valve appearance alone is not enough. (schwalbe.com)
Use the procedure below only after confirming the system. It is not a guide to tubular tires or tubeless puncture repairs.
For a first attempt, choose a familiar pedal bicycle and work somewhere you can pause without pressure to finish. Treat wheel removal and reattachment as separate skills to learn—not incidental steps. If the axle, brake release or wheel installation instructions are unclear, arrange a hands-on demonstration before taking the wheel off. Trek’s owner guidance specifically directs riders to follow the applicable axle manufacturer’s instructions. (media.trekbikes.com)
2. Match the replacement tube and gather your tools
Read the tire sidewall before buying a tube. Look for its ETRTO size: a marking such as 40-622 identifies a nominal tire width of 40 mm and a bead-seat diameter of 622 mm. Use that marking rather than relying only on a broad label such as “28-inch.” (schwalbe.com)
A replacement tube must cover the tire’s diameter and width in its manufacturer’s approved size range. Tubes can cover several tire widths, but that does not make every tube interchangeable. Also match the valve type and choose a stem long enough for your rim and pump connection. (schwalbe.com)
Common valves include:
- Presta: narrow, with a small threaded nut at the tip. Loosen that tip nut before inflation.
- Schrader: broader, with a recessed central pin, like a car tire valve.
- Dunlop/Woods: another bicycle valve type whose removable core and retaining nut require their own handling procedure.
Use a compatible pump head. Do not force a different valve through the rim hole or assume that a narrower valve is an acceptable substitute. (schwalbe.com)
Gather:
- Bicycle tire levers.
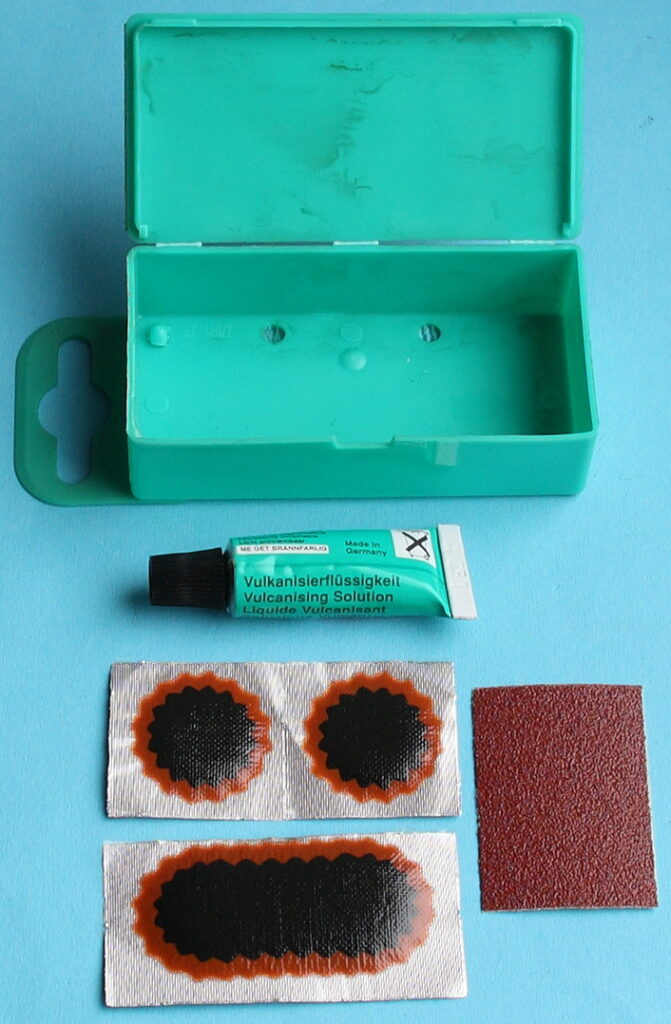
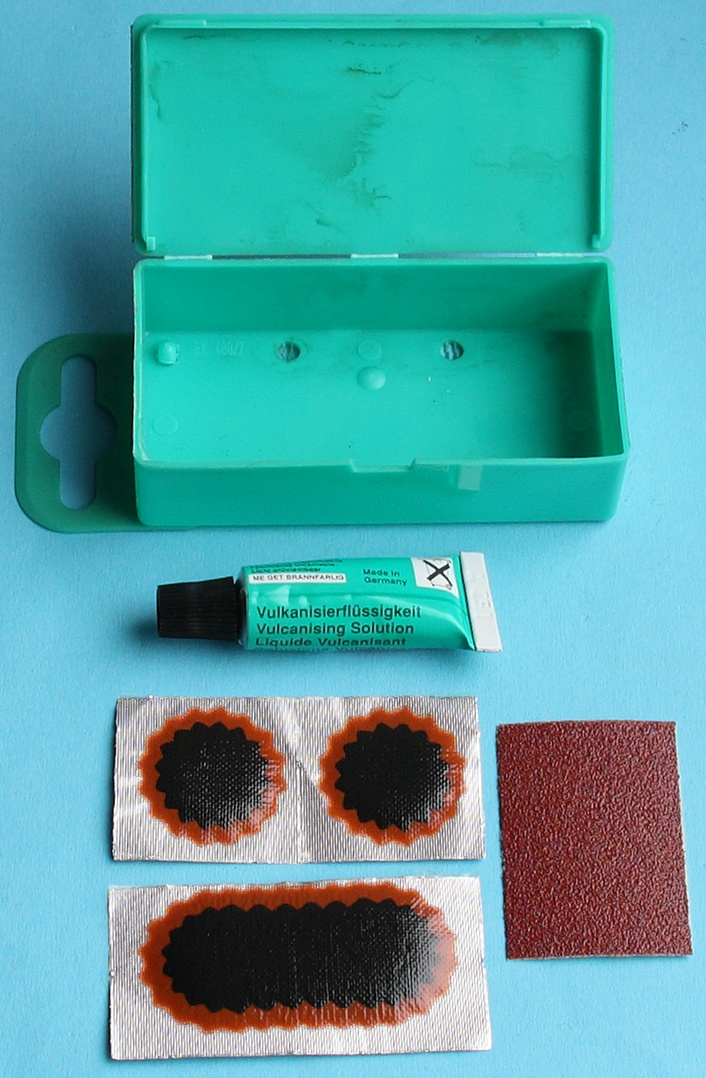
- A compatible spare tube, or a patch kit approved for your tube.
- A compatible pump, preferably with a pressure gauge.
- The correct axle tool, if required.
- A clean rag and a pen for marking the leak.
- Water for finding a small leak, if available.
A repair stand is helpful but not essential. Screwdrivers and knives are not substitutes for tire levers. (parktool.com)
Worked sizing example: Suppose your commuter tire says 40-622 and its existing valve is Presta. Look for a tube whose approved size list includes 40-622, with the correct Presta stem length. This is a hypothetical selection example, not approval of a particular product. The tire marking and tube manufacturer’s compatibility information remain the deciding checks. (schwalbe.com)
3. Remove the wheel and release the tire
Start by reading the wheel-removal instructions for your bicycle. For a rear wheel with derailleur gears, shifting onto the smallest rear sprocket makes removal easier. Support the bicycle without resting it on the derailleur. Release the rim brake only as its instructions specify, if needed for tire clearance. (parktool.com)
With hydraulic disc brakes, do not squeeze the brake lever while the wheel is out. The pads can close together and prevent the rotor from fitting back between them. (parktool.com)
Then:
- Release the axle using its actual mechanism. Quick releases, thru-axles and axle nuts are not operated identically. Keep removed parts in order.
- Remove the wheel. Stop if it remains restrained by unfamiliar cables, fittings or attachments. (parktool.com)
- Deflate the tube completely. Remove any valve retaining nut that must come off for removal.
- Loosen the tire’s edge from the rim. This reinforced edge is the bead.
- Lift one bead over the rim with your hands or suitable tire levers.
- Pull out the tube and withdraw its valve through the rim hole.
- Remove the tire completely if needed for inspection. Never use a sharp improvised tool. (media.trekbikes.com)
Do not force a wheel or tire that you cannot release using the documented procedure. Pause and get help rather than turning uncertainty into damage.
4. Find the leak and inspect the tire and rim
Add enough air to the removed tube to locate the leak. Listen for escaping air; if the hole is elusive, submerge the tube and watch for bubbles. Mark the location. (parktool.com)
The damage offers clues, not a guaranteed diagnosis:
| What you find | What to investigate |
|---|---|
| A single small puncture | A thorn, glass fragment, wire or similar object |
| Two nearby slits | A pinch between the rim and an obstacle |
| A hole on the rim-facing surface | Rim tape, a spoke end or a sharp rim feature |
| Damage near the valve | Valve alignment and the valve-hole area |
These patterns are described in Park Tool’s tube-inspection guidance. Check the suspected cause rather than assuming a new tube alone solves it. (parktool.com)
Inspect both the tread and the inside of the tire. Use a rag before cautiously feeling inside; embedded debris may still be sharp. Examine the sidewalls and beads for damage. (parktool.com)
Inspect the rim tape—the protective strip inside the rim. It must securely cover the spoke holes and protect the tube from spoke ends and metal edges. Torn or displaced tape needs correction with suitable material before fitting another tube. Do not simply hide an unresolved sharp edge beneath the replacement. (schwalbetires.com)
Stop point: A torn casing or damaged bead needs more than a tube repair. A tire with its casing threads or puncture-protection layer showing through the tread has reached its wear limit and needs replacement. (parktool.com)
5. Replace the tube or patch a suitable hole
Choose replacement when the tube damage is large or you doubt the repair. A suitable small puncture can be patched, but the patch system must be appropriate for the tube material. (parktool.com)
For a conventional rubber tube and a compatible vulcanizing patch kit:
- Locate and mark the hole.
- Lightly roughen the patch area as instructed.
- Clean it and let it dry.
- Apply a thin layer of the supplied solution over an area slightly larger than the patch.
- Let the solution dry as directed before applying the patch.
- Handle the patch by its edges, center it over the hole and press firmly.
- Check that the edges have bonded before reinstalling.
Do not apply the patch to wet solution unless the kit specifically instructs otherwise. Do not mix procedures for glue-on and self-adhesive patches. Park Tool describes its self-adhesive patches as temporary repairs; follow the particular kit’s limitations. (parktool.com)
If a compatible replacement is available and the patch instructions are uncertain, replace the tube rather than improvising.

6. Refit the tire without trapping the tube
Check any tire rotation arrow before mounting. Add only enough air for the tube to take shape, then position it inside the tire without folds. Insert the valve straight through the rim hole. (parktool.com)
Fit the beads according to the tire manufacturer’s instructions, using your hands where possible. Schwalbe’s fitting guidance recommends beginning the second bead opposite the valve. Keep checking that the tube stays inside the tire, not caught between bead and rim. Avoid sharp tools. (schwalbe.com)
If the final section resists:
- Pause rather than pulling harder.
- Recheck that the already-mounted bead has room in the rim’s center channel.
- Make sure the tube is not trapped.
- Seek help if you cannot fit it without risking damage.
An installation pinch can puncture the replacement tube before you ride. (schwalbe.com)
Inflate gradually. Inspect both sides at low pressure. Where the tire has a molded seating line near the rim, it should remain evenly positioned around the circumference. Stop and deflate if the tube protrudes or the tire bulges. (parktool.com)
Use a gauge and follow the applicable tire and rim instructions. Never exceed either component’s permitted maximum. A maximum is a limit, not automatically your everyday riding target; DT Swiss distinguishes mounting pressure from the desired operating pressure. (d2a13k6araex7u.cloudfront.net)
If the valve has a retaining nut, tighten it by hand only—not with pliers. (schwalbe.com)
7. Reattach the wheel and make the final checks
Install the wheel with the axle fully seated and the wheel centered. Follow the exact retention procedure: a conventional quick-release cam lever must close correctly, while axle nuts and thru-axles require their specified tightening method. Do not borrow a torque value from another bicycle. Reconnect any brake release you opened. (parktool.com)
Before riding, check:
- Wheel attachment: the retention mechanism is fully secured; no parts are missing or uncertain.
- Clearance: the axle lever does not interfere with spokes, brakes or accessories.
- Tire: the bead sits evenly, the valve is straight and there is no bulge.
- Brakes: both operate, and any released mechanism is restored.
- Rotation: spin the wheel and investigate unexpected rubbing or movement.
Use your bicycle’s prescribed pre-ride checks. A spinning wheel alone does not establish that it is securely attached. (media.trekbikes.com)
For this beginner procedure, treat a hub-motor wheel, unfamiliar axle, damaged tire or rim, uncertain brake reassembly, or uncertain wheel security as a reason to seek qualified help. This is a conservative scope limit, not a claim that those systems are unrepairable.
The repair is finished only when the puncture cause has been addressed and the tire, wheel attachment and brakes have passed their applicable checks. If any check remains uncertain, do not ride. (parktool.com)